So, with spending hours in my yard I've been slacking when it comes to updating this blog. I'm going to attempt to wrap up everything we've done so far.
April
 |
| Rhododendron & Spirea |
As I've said before we buy a lot of distressed plants from Lowes and with a little love and attention they really take off! This Rhododendron was only a few dollars and it looked pretty pitiful when we planted it a year ago but it has doubled in size and was covered in buds! We waited in anticipation to see what it was going to do as spring got into full swing.
 |
| Japanese Quince, Juniper and Sedum |
The Quince in the center of the photo to the right was also a distressed plant that was about $2 and looked like a stick coming out of the ground at first and now its taken off and more than tripled in size.
Quick Tip: As I've said before, if you have the time and patients to plant and care for distressed plants you will be amazed at the payoff you will get the next year!
 |
| Iris, Columbine, Creeping Phlox |
 |
| Purple Creeping Phlox |
 |
| Random Variety of Plants |
While this flower bed (left) looks a little bare, it has mostly late spring/summer plants in it. I'm looking the forward to how it's going to look, especially the Kaleidoscope Butterfly Bush. And as you will soon see, it has filled in a lot!
 |
| Bleeding Heart & Hosta |
My favorite early spring plant has to be Bleeding Heart! This particular plant came from my grandparents farm and is really taking off this year! Seeing the delicate little heart shaped flowers dancing in the breeze makes me smile and think of my Grandma who also loves them!

 |
| Purple Anemones |
A new find this spring were these purple Anemones! The color was stunning and though they didn't last long I'm hoping that they make an appearance again next spring!
Gardening is definitely a trial and error thing so don't get discouraged if things don't take off like you want. Sometimes it takes plants a year or so to really get established and sometimes they were just planted in the wrong spot.

This is my little Fairy friend that watches over my garden!
'Always remember to keep room in your garden for the fairies to dance!'
May Days!
 |
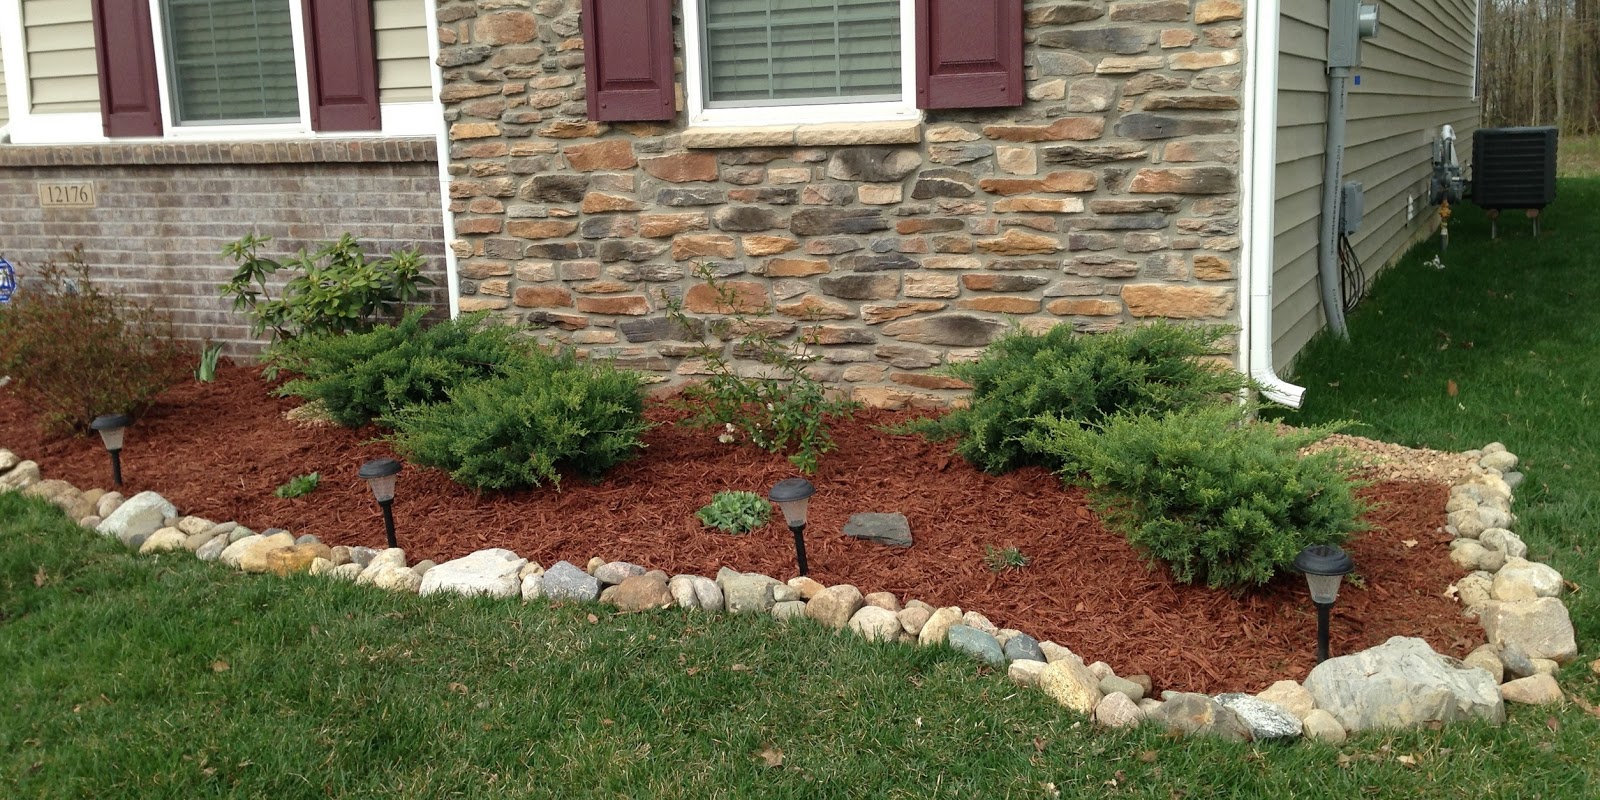
| Front of our home |
May has brought lots of changes to our yard. We've cleaned out, pruned up, expanded and re-mulched all our flower beds.
It's been a lot of hard work but it is very therapeutic and rewarding watching everything that we've planted thrive!
I've also had fun sharing gardening ideas and tips that I've leaned along the way with friends and family. We even took a day off from our yard to help one of our friends redo her front yard, desperate landscape style!
 |
| Snapdragons |
Flower Power!
Our yard is full of different kinds of flowers and lots of color!
I don't put in many annuals but I LOVE snapdragons and they will be an addition I make every spring! We also put in pansies, petunias and geraniums.
 |
| Columbine |
Some of Our perennials...
 |
| Columbine |
 |
| Rhododendron |
The color was absolutely gorgeous!
I did find it interesting how many people thought it was a hydrangea... Um, not quite.
My husband loved the rhododendron so much that he actually went and got 2 more distressed at Lowes that are now in our back yard.
 |
| Rhododendron bloom up close |
Another spring favorite of mine is Iris. My grandmother always had them all over around our family farm growing up. The Iris I have are actually transplants from the farm.
The iris as well as the other plants that I was able to transplant mean so much to me because the farm was sold this past year.
Having a little piece of my grandparents garden planted in our yard will always bring back wonderful memories and years of beauty!
Having a little piece of my grandparents garden planted in our yard will always bring back wonderful memories and years of beauty!
 |
| Iris & Columbine |
 |
| Iris |
 |
| Orange Bearded Iris |
 |
| Purple Bearded Iris |
 |
| Various plants |
This front flower bed is starting to fill in.
We added Hollyhock, tuttie frutti mint and hens & chicks this year.
 |
| Dianthus |
 |
| Salvia |
 |
| Canna Lily starts |
 |
| Julia Child Rose |
Bare Root Roses:
In memory of my mother in law Joretta, who passed away in March, my aunt sent us two bare root rose bushes. I was blown away buy the gesture and was very excited to plant these and see what would happen. There where a couple of problems though.#1 I had no idea what to do with bare root roses!
#2 When the roses were delivered we got the last big snow storm of the season!
 |
| Blaze of Glory Climbing Rose |
Luckily the sun came out and melted the snow quickly and the weather warmed up but the rose bushes had sat in a box for over a week and I was very worried that they had completely dried out.
So after a lot of research on the internet I found a great tutorial on how to prepare and plant bare root roses on YouTube. It gave me the confidence to be able to plant them.
I soaked them for 24 hours in a 5 gallon bucket of water, then figured out where I wanted to plant them in the yard and dug out the holes deep enough to cover the roots and bud union. The trick is to build up a little mound in the center of the hole to sit the roots on then fill in the hole being sure to water as you go to get rid of any air pockets. Some other advice I got from the tutorial I watched was to bury the bud union where the canes come out to give you a more stable plant and not to fertilize the rose until you see 2-3 inches of new growth because you want the roots to get a good start and if you fertilize it too soon you can force the plant to shoot up before it has a good solid root system.
So with a little prayer that the roses would survive after becoming so dry in the box we waited, and waited and waited for what seemed like an eternity and one day I checked and THERE WAS NEW GROWTH! I was so excited!
Stay tuned for how they look now because they have really taken off in the last couple of weeks! I will be posting those pics soon as I get this blog caught up with where we are in the yard. :)
 |
| Knock Out Roses |
 |
| Crystal Fountain Clematis |
If you look back in older posts from last year you will see pictures of this knock out rose (left) that was a distressed steal from last year. It has tripled in size and has been covered in blooms! It's gorgeous and smells amazing!
The Clematis (right) was planted from a start we got from an online nursery and it has really taken off this year as well. We even had to get a bigger trellis for it to grow on. This year I have planted another clematis start next to this one that is a different color and eventually I plan on having a large permanent trellis built for the two to grow together on.
I have a lot more to share coming up very soon but right now I'm very tired and need to get some sleep so I have the energy to finish my latest garden project!
Until next time... Happy Gardening!